For lack of time had left abandoned the little things the kids. So today published two tickets to compensate a little.
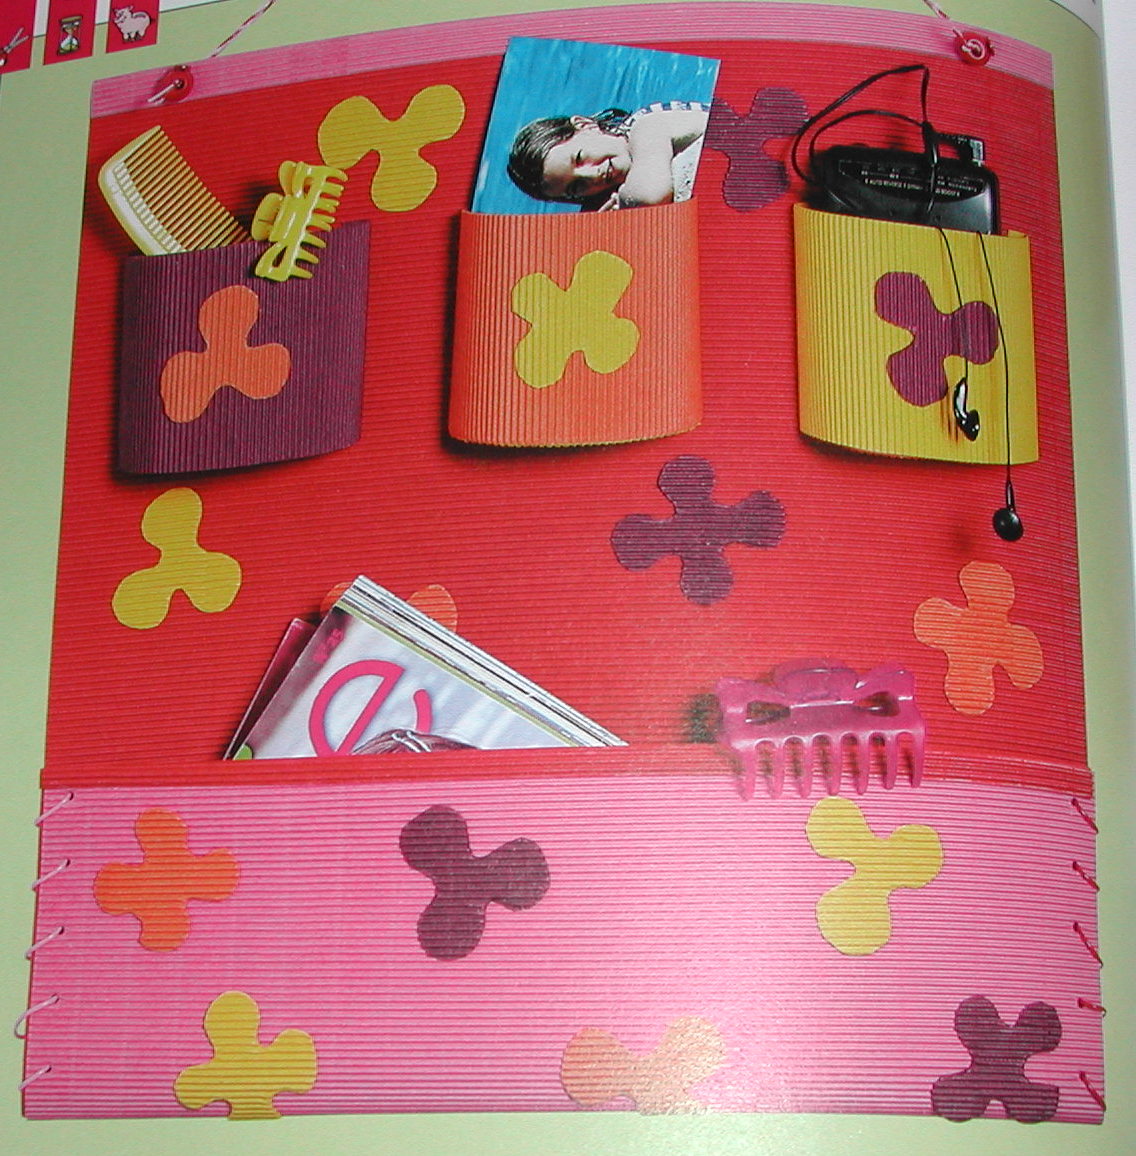
In this, I present a tutorial desktop organizer.
MATERIALS: Paper wavy colored plastic bead, button lock closures, pencil, ruler, glue, scissors, hole punch, box cutter and cheeses
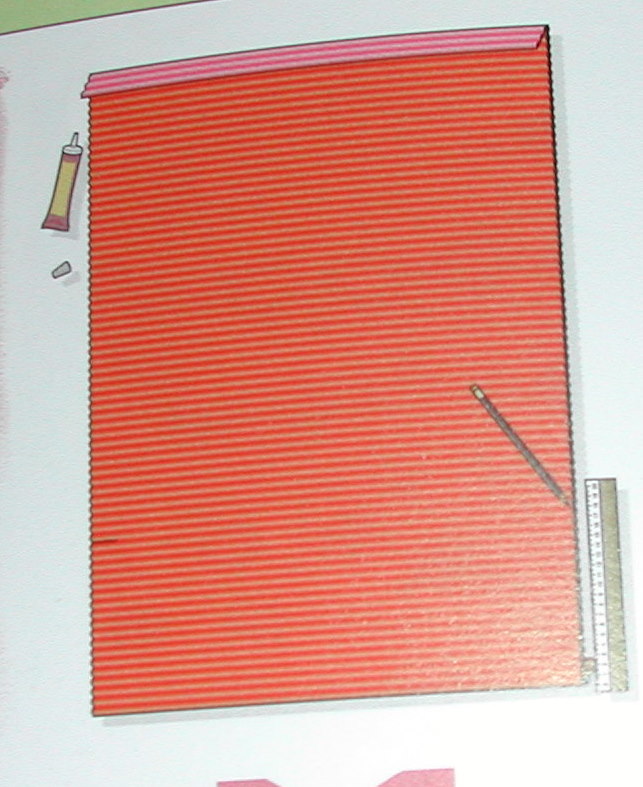
1 - Paste the back two sheets of 50x70 cm. corrugated cardboard of different colors, move them so that a 2 cm.más is higher than the other. Fold the piece that stands out and paste on another sheet. Allow to dry. On each side, make a mark about 18 cm. lower side
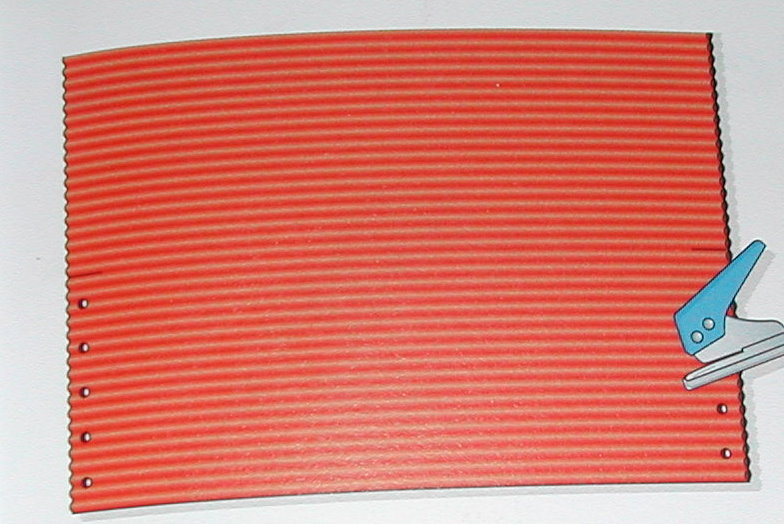
2 - Each side make 5 holes between the bottom of the carton and brands, leaving a gap of 3 cm. between hole and hole

3 - Join large pocket with a folded cardboard by 18 cm. the bottom side. Each side facing them add 5 holes with the first. Sew the two sides having a plastic cord through the holes and knot the ends

4 - COTAR in half the top and bottom of the box of cheeses, make 3 times the contour of an average cardboard box rolling, cutting and pasting the resulting semicircles at half cases
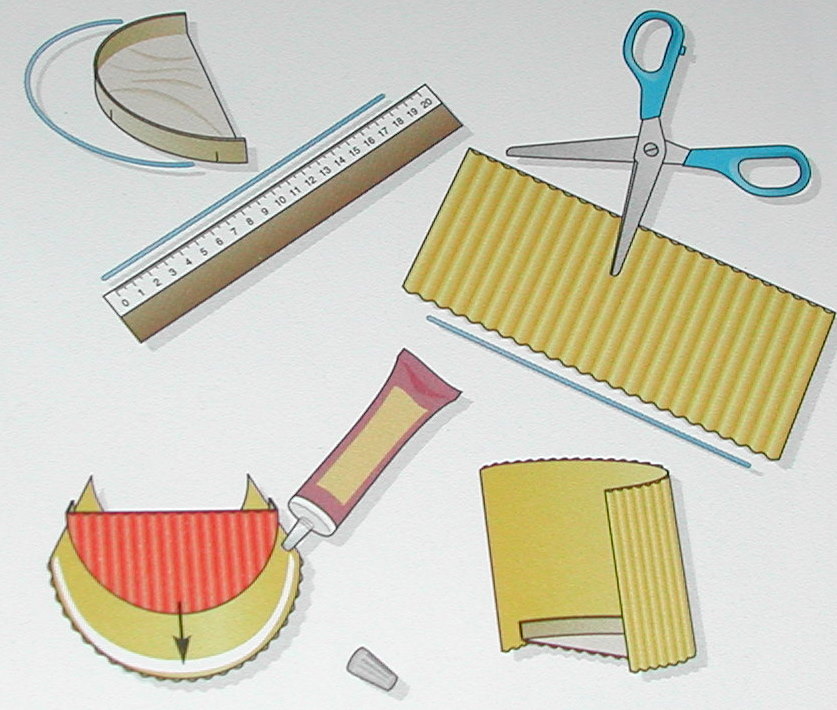 5 - Measure the perimeter of the half boxes with string and add 3 cm. Cut 3 rectangles of 11 cm. height and length equal to the measurement obtained. Channels have to remain on board vertically. Glue the rectangle to the half cases (see image above)
  6 - Make two flaps and glue the bottom. Then glue the pockets at the ceiling through the middle starting
 7 - Make two holes in the upper ends of the panel, passes a braided plastic cord and add the closures. Complete with floral decoration corrugated
* Tutorial taken from "The Book of LES NENES"
's Window M ª del Carmen © 20
0 comments:
Post a Comment